Introduction
Before getting started
- Make sure your Smartrite device is Powered On.
- Download the Smartrite mobile app from the Google Play Store or Apple App Store.
- Make sure that a sufficiently strong WiFi signal is available in the area of the device. Contact the system administrator to obtain the password of the WiFi network you want to connect to.


Connect to Wi-Fi network
The Smartrite device can be connected to a cloud server, where all information can be stored regarding: the operation of the device, and data associated with the cold room it controls. The cloud server also allows online programming of the device.
To connect the Smartrite device to the cloud server it is necessary to enable and setup the device Wi-Fi connection for Internet access. To do that, use the Smartrite application (available for Android and iOS (starting February 2023). The application uses Bluetooth connection to connect with the device, allowing you to choose the preferred Wi-Fi and to provide the corresponding network credentials.
Note
Smartrite devices can connect to only2.4 GHz Wi-Fi networks.Please make sure that your router does have this option available.
If you have not used the application before, you must register and create an account with password.4 The login and registration options are available on the log-in screen. Once your account has been created and you’ve signed in Main Device List Dashboard where you can monitor and manage all your allocated devices.
Note
If you have no allocated devices, press Search on the bottom of the screen and you will be redirected to the Bluetooth Nearby Devices Scanning Screen.
Login or Register into the Smartrite App
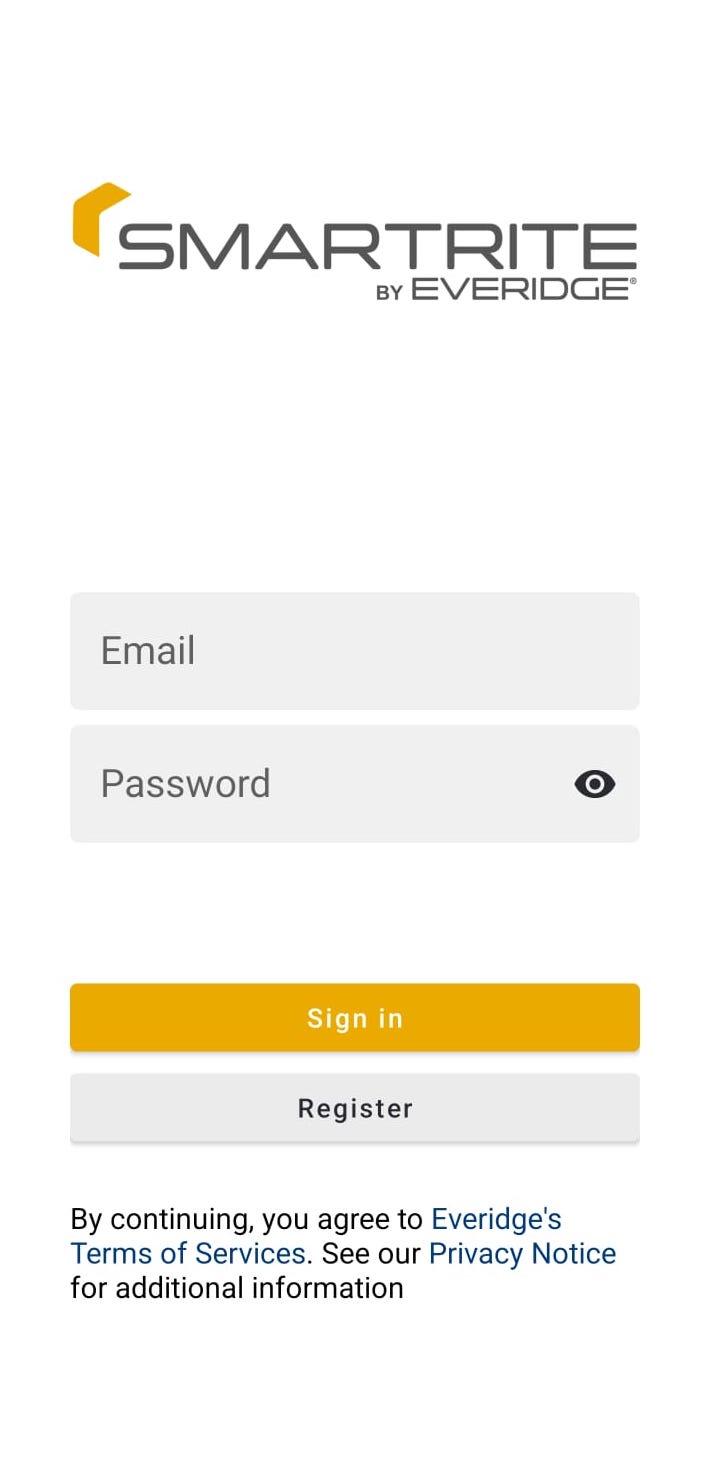
Sign In
If you are already registered on the server, use your registered e-mail and password to sign in.
First time users can register using Cloud web based app available at smartrite.everidge.com)or by pressing the Register button
Sign in the app using registered e-mail and password. Else you can register on the server from the app pressing the register button.
- Log In
Enter your registered E-Mail and password
App will open theMain Device List Dashboard where you can monitor and manage all your allocated devices.
Note
If you have no allocated devices, press Search (bt icon) on the bottom of the screen and you will be redirected to the Bluetooth Nearby Devices Scanning Screen .
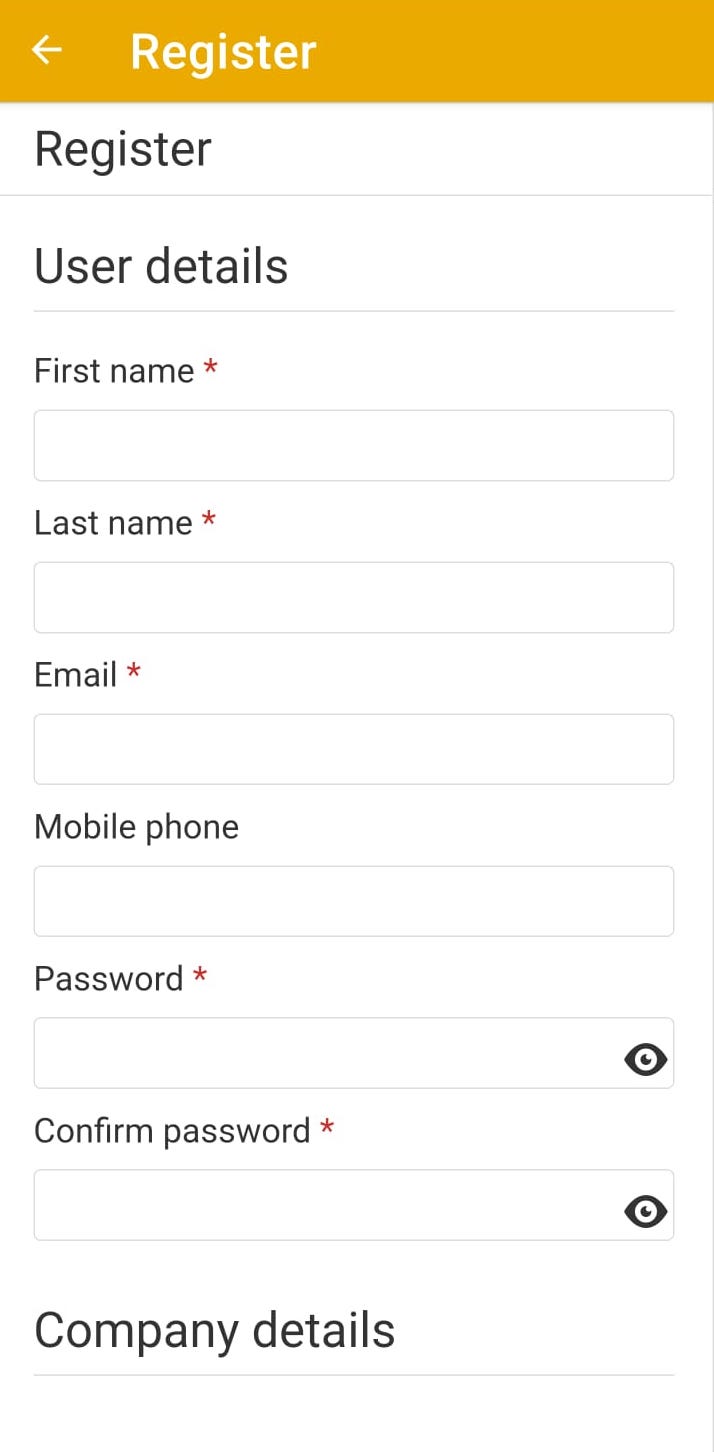
Register
Complete all the required fields and press register.
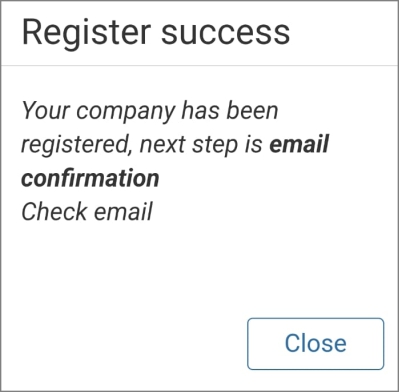
To finalize the registration process a confirmation email will be sent to your provided e-mail, containing a confirmation request button and a pin code.
Click on Confirmation and enter the pin to finalize registration. After, you will be automatically redirected to the login page.
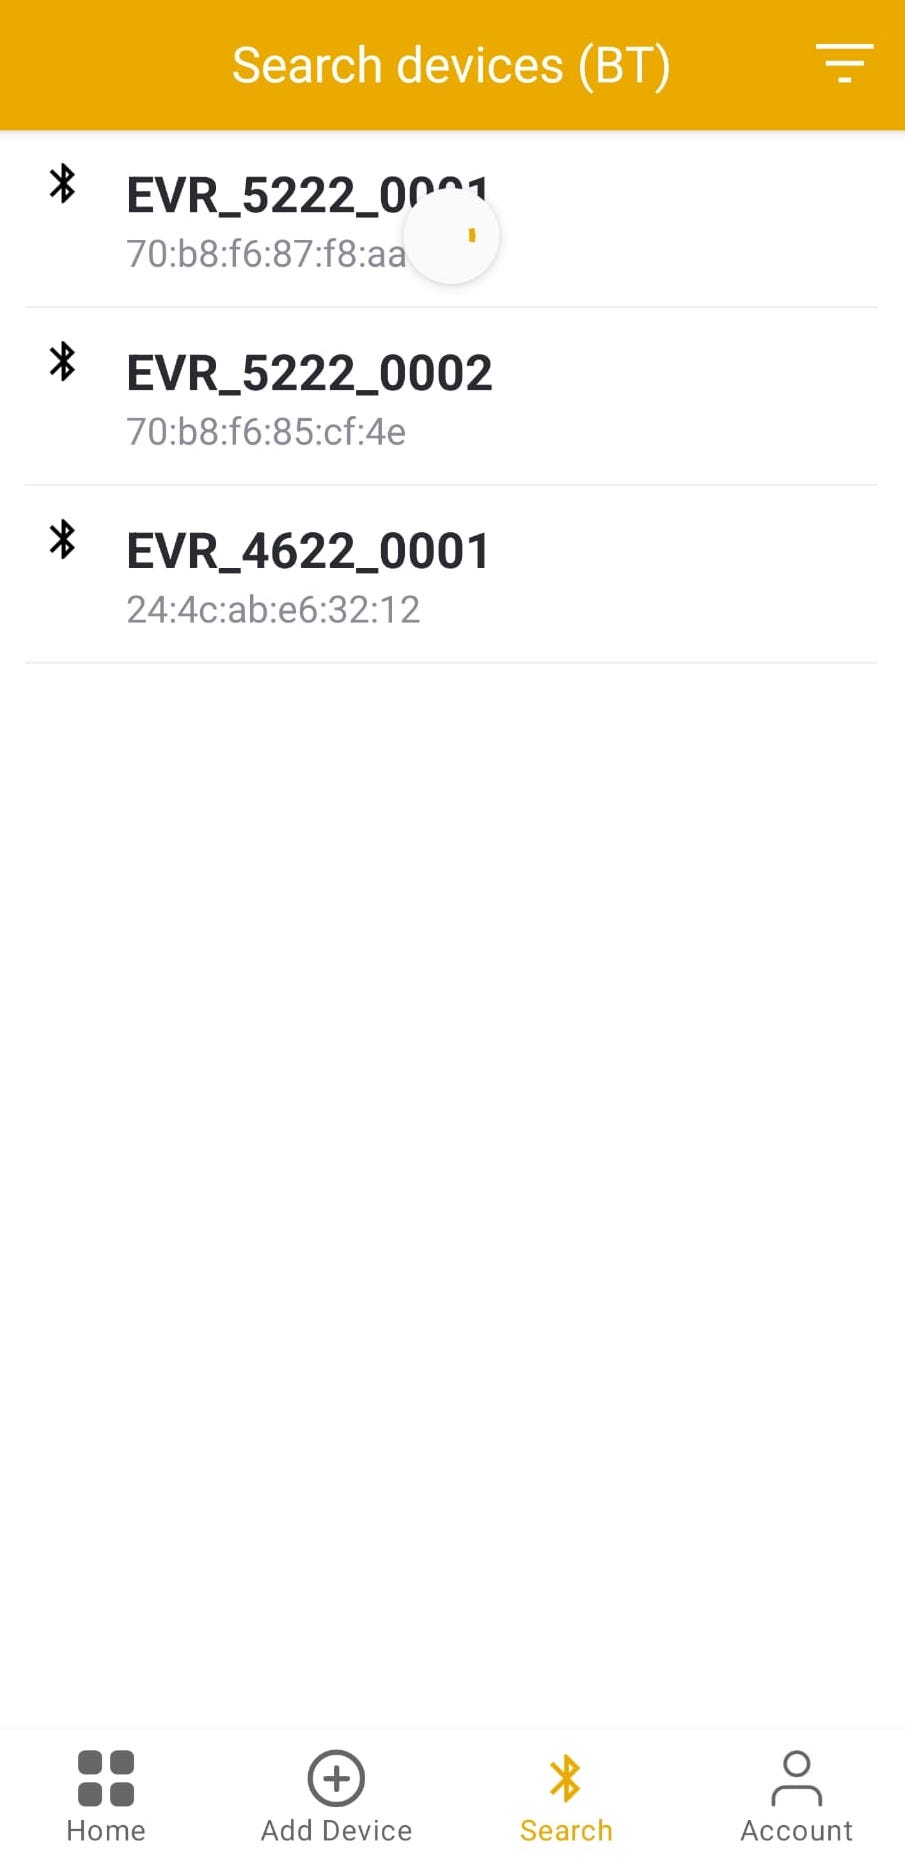
Bluetooth Nearby Devices Scan
If you have no allocated devices, in the Main Device List Dashboard Search at the bottom of the screen and you will be redirected to the Bluetooth Nearby Devices Scanning Screen.
The Search devices (BT) will be displayed, field with discovered devices identified in the list by the Device ID and Device BT MAC.
Note
Device ID is preceded by EVR indicator, for simplified identification of the Everidge devices between other Bluetooth emitting devices in the area.
Select the device you want to connect to and press Connect.
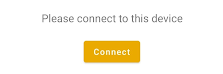
Select the device you want to connect to and press Connect.
For security reasons (only authorized users are able to connect), the device has a preregistered BT password (which cannot be changed) and you will be asked to enter it to be able to go further.
The Smartrite SMRT device BT password is : SMRT001
Bluetooth Tip
Make sure you are within a maximum of 5 meters devices range for the device initiation procedure.
The app might ask you to turn on Bluetooth and Location services and grant permission to Smartrite app to use them.
When connected through Bluetooth to the device, a confirmation message will be displayed and you will be able to:
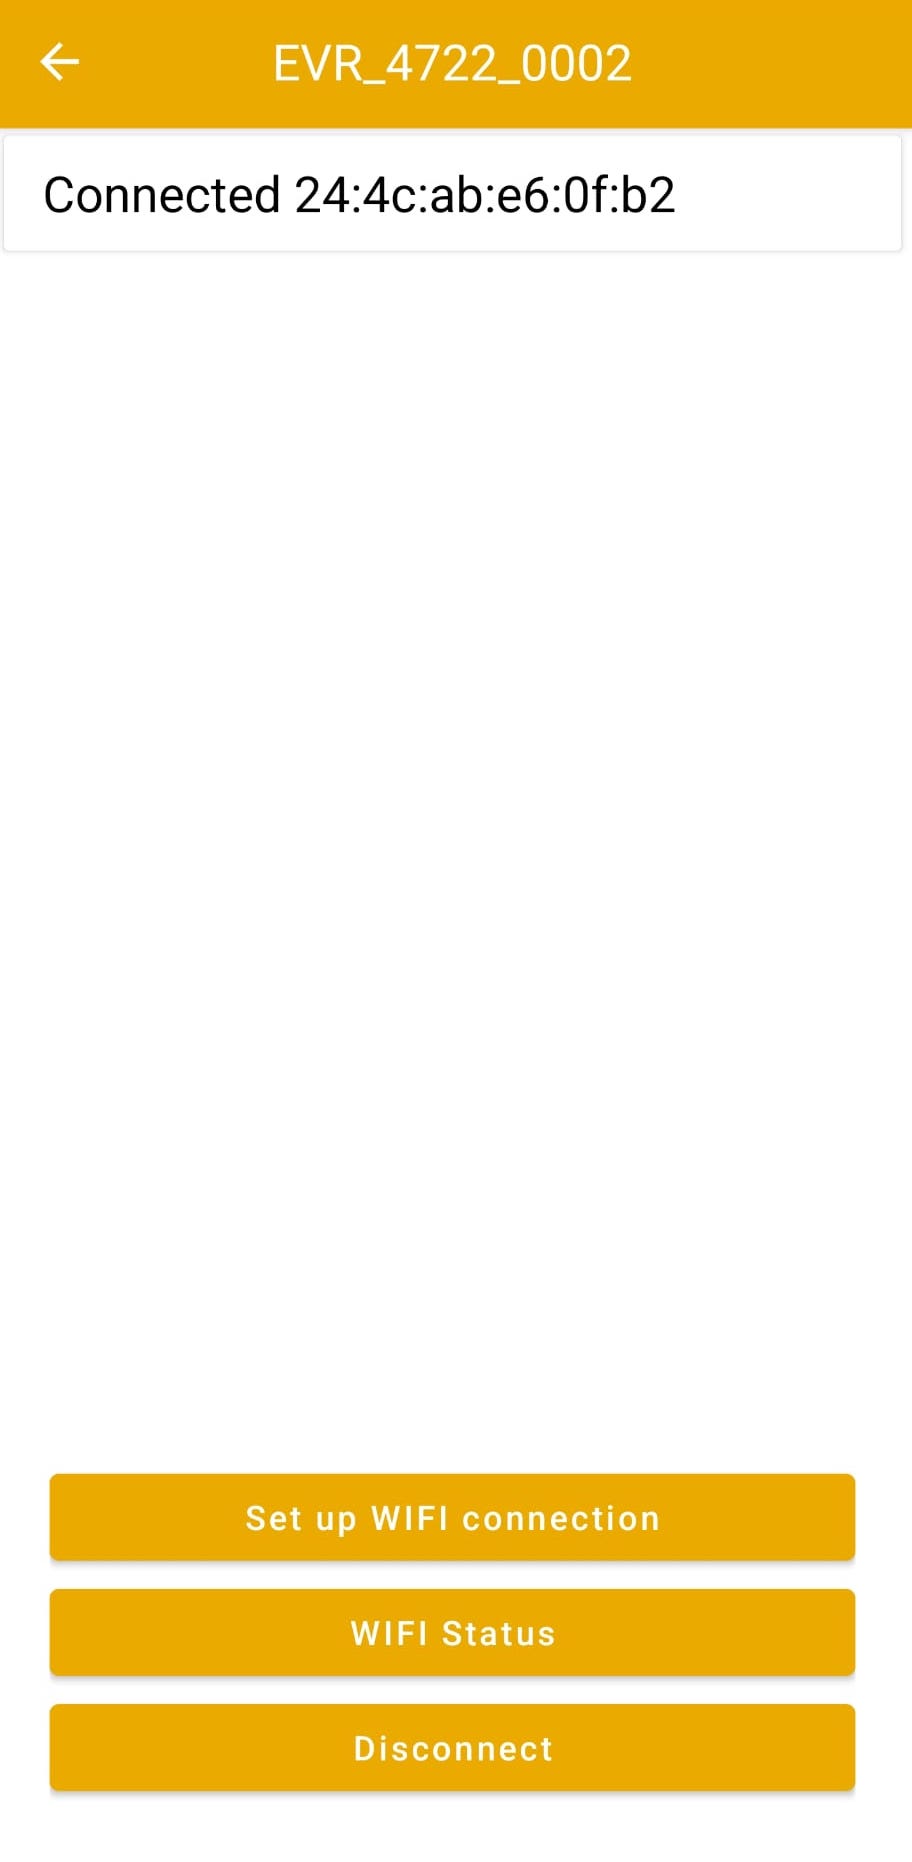
Device Wi-Fi Setup
Device WiFi Setup When you select Set up Wi-Fi connection a list of all available Wi-Fi networks is displayed, with the SSID, signal strength and network emiting frequency.
Note
Smartrite app will display 2.4 GHz Wi-Fi networks only.
If you are using a mesh Wi-Fi structure (multiple AP with the same SSID) the strongest network
will be displayed (and can be selected).
Warning
As long as the device is not moved from the original location, it will remain connected to the selected Wi-Fi. If the device is relocated or the Wi-Fi network is changed, you need to reconnect the device to the new Wi-Fi.
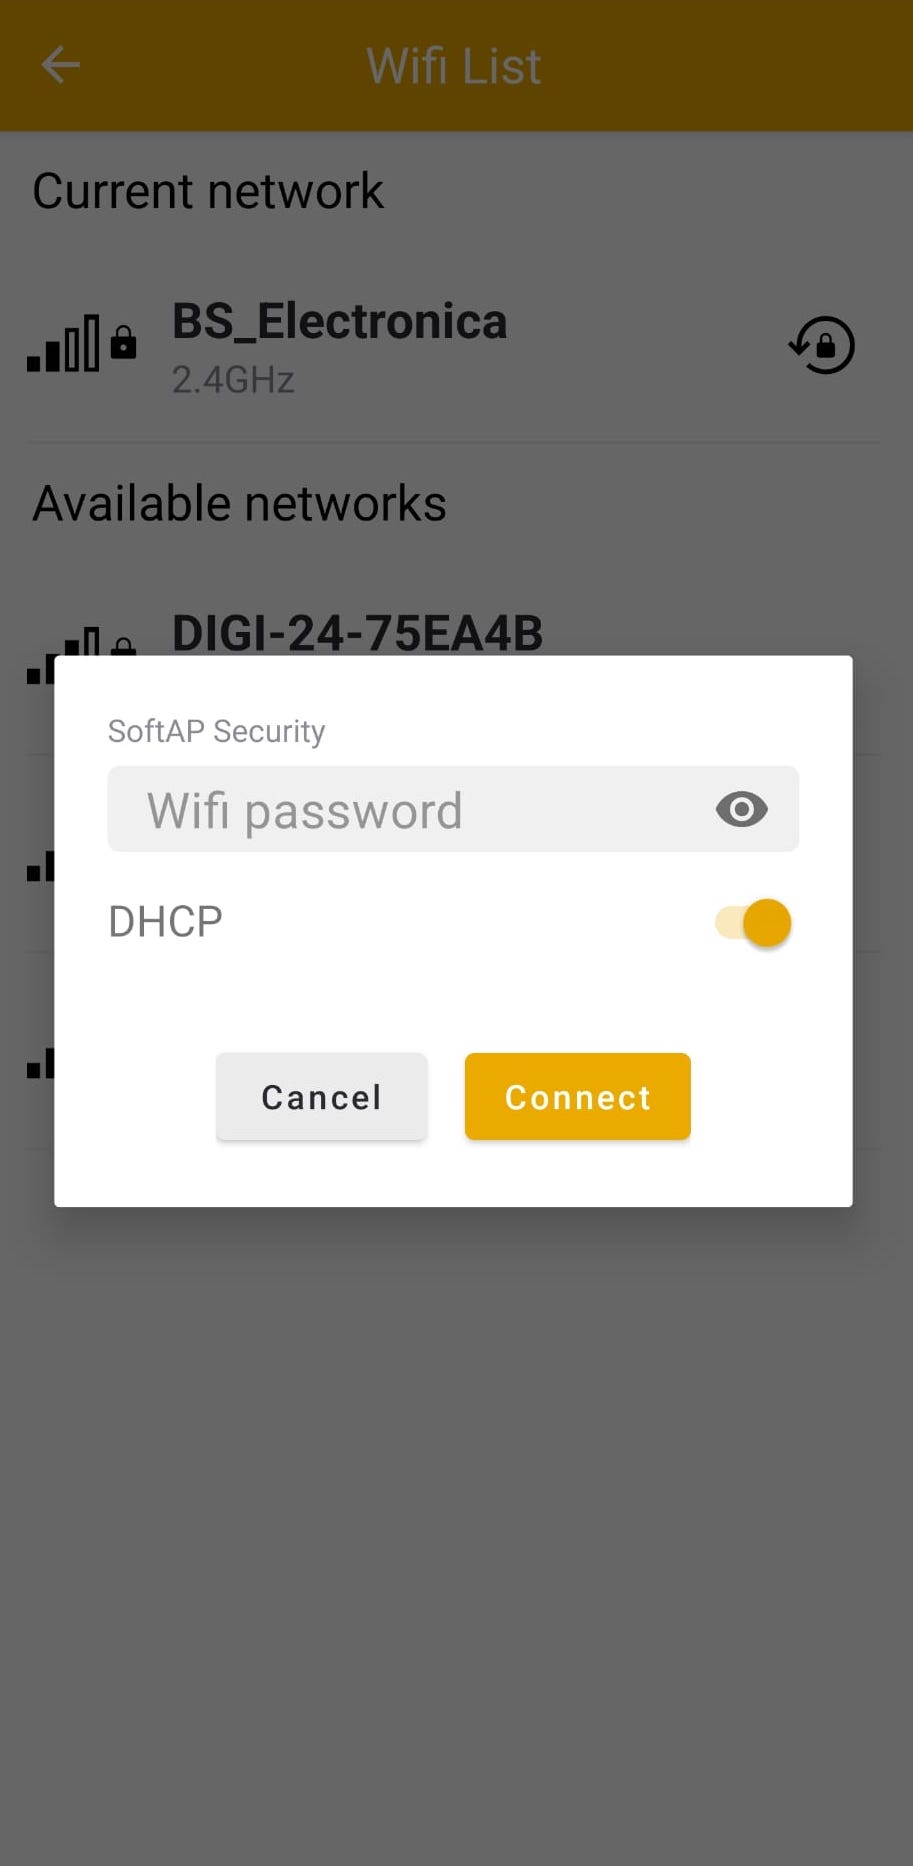
Select the desired Wi-Fi network from the list. A pop-up will appear on the phone screen where you can enter the Wi-Fi network password.
You can choose for an automatic IP to be allocated to the device (using the DHCP router service) or you cand choose to manually set up the IP, subnet mask and gateway IP.
Note
When already connected to a Wi-Fi network, you are able to forget it.
Press to delete the saved network password for that SSID
This feature can be used when the system admin changes the network password and the device fails to connect because it uses the old password. It will allow you to enter and save the new password.

Device Status
Indicates the Wi-Fi connection, current network SSID, IP, mode and BSSID.
Disconnect
Press this button to disconnect the BT connection to the device

Add New Device
To be able to monitor the device in the cloud it is necessary to allocate this device to your own user. In this case, you will be the admin for that device and you will be able to share the device with other power users or users.
To allocate the device:
- Enter the Device Id and MAC address into the corresponding fields and press Add. Device ID and MAC are available:
- On the printed label on the device screen and
- On the device TFT: navigate to
Menu->Technician Menu->WiFi Setup - Scan QR Code using the app – press SCAN QR CODE button
Simply press Add a new device from the navigation menu, in the pop-up that will appear on the screen, press SCAN QR CODE and then point the phone camera at the device screen to scan the QR code.
The QR code can be found in the Menu->Technician Menu->WiFi Setup
Note
Frame the QR code in the square indicated on the mobile phone screen. As soon as the QR code is read, the corresponding Device ID and MAC fields are automatically populated.
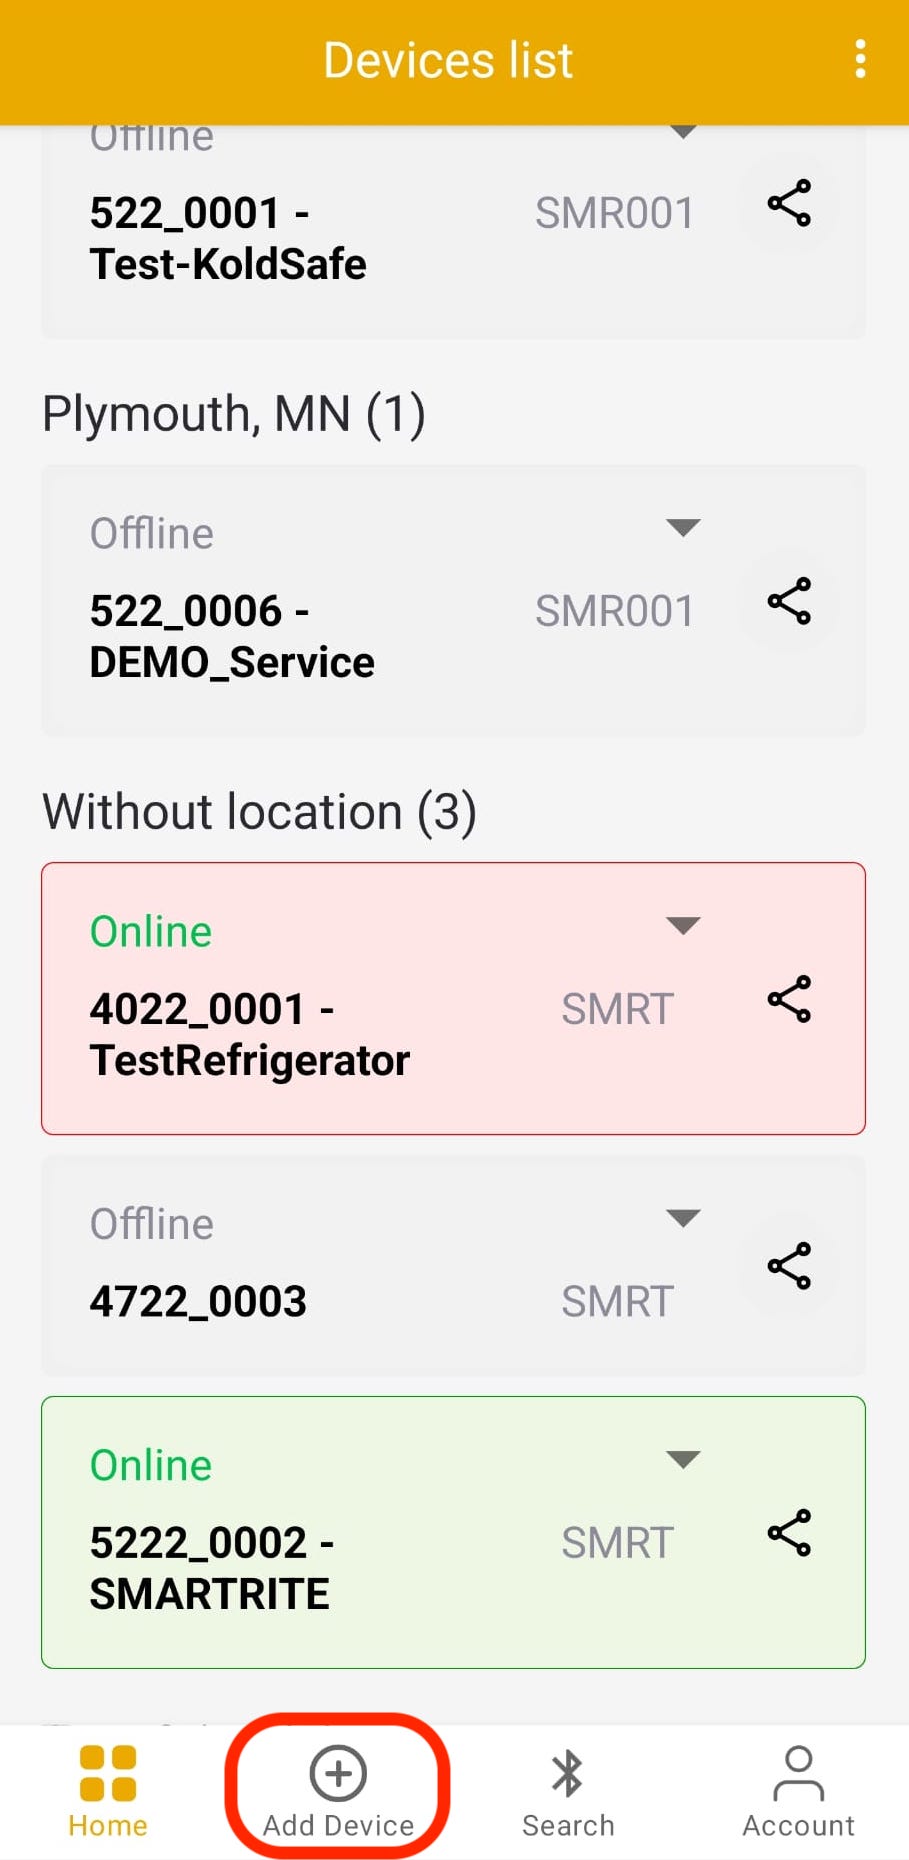
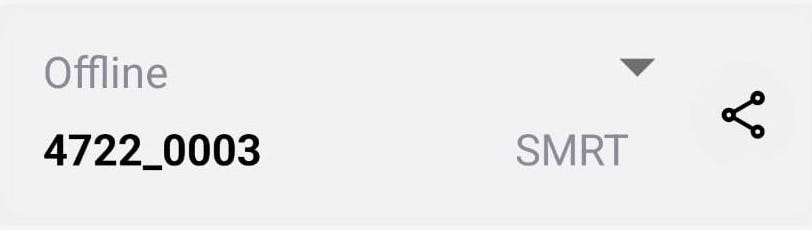
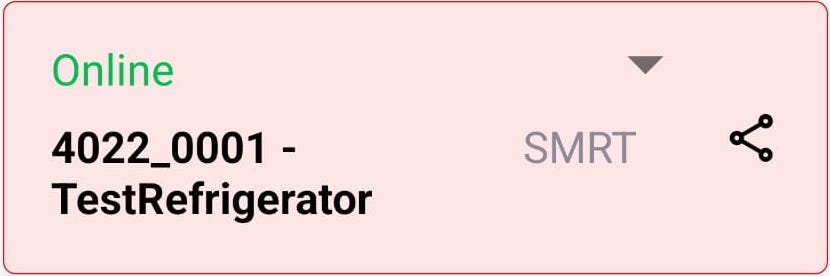
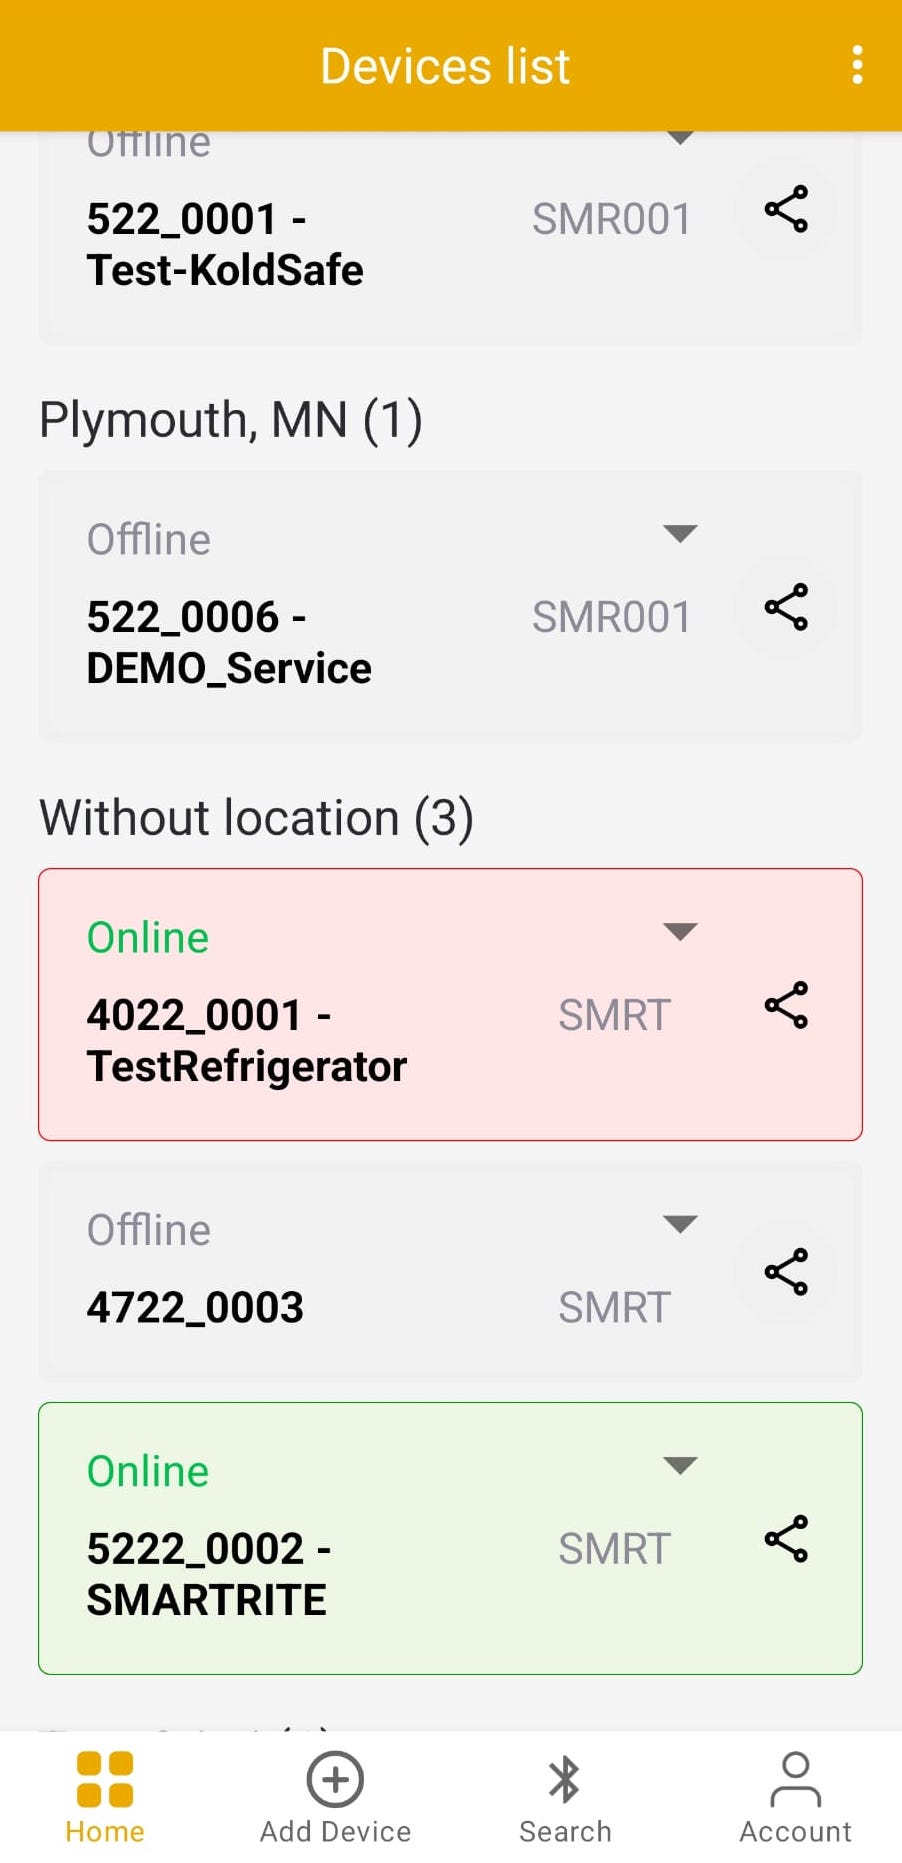
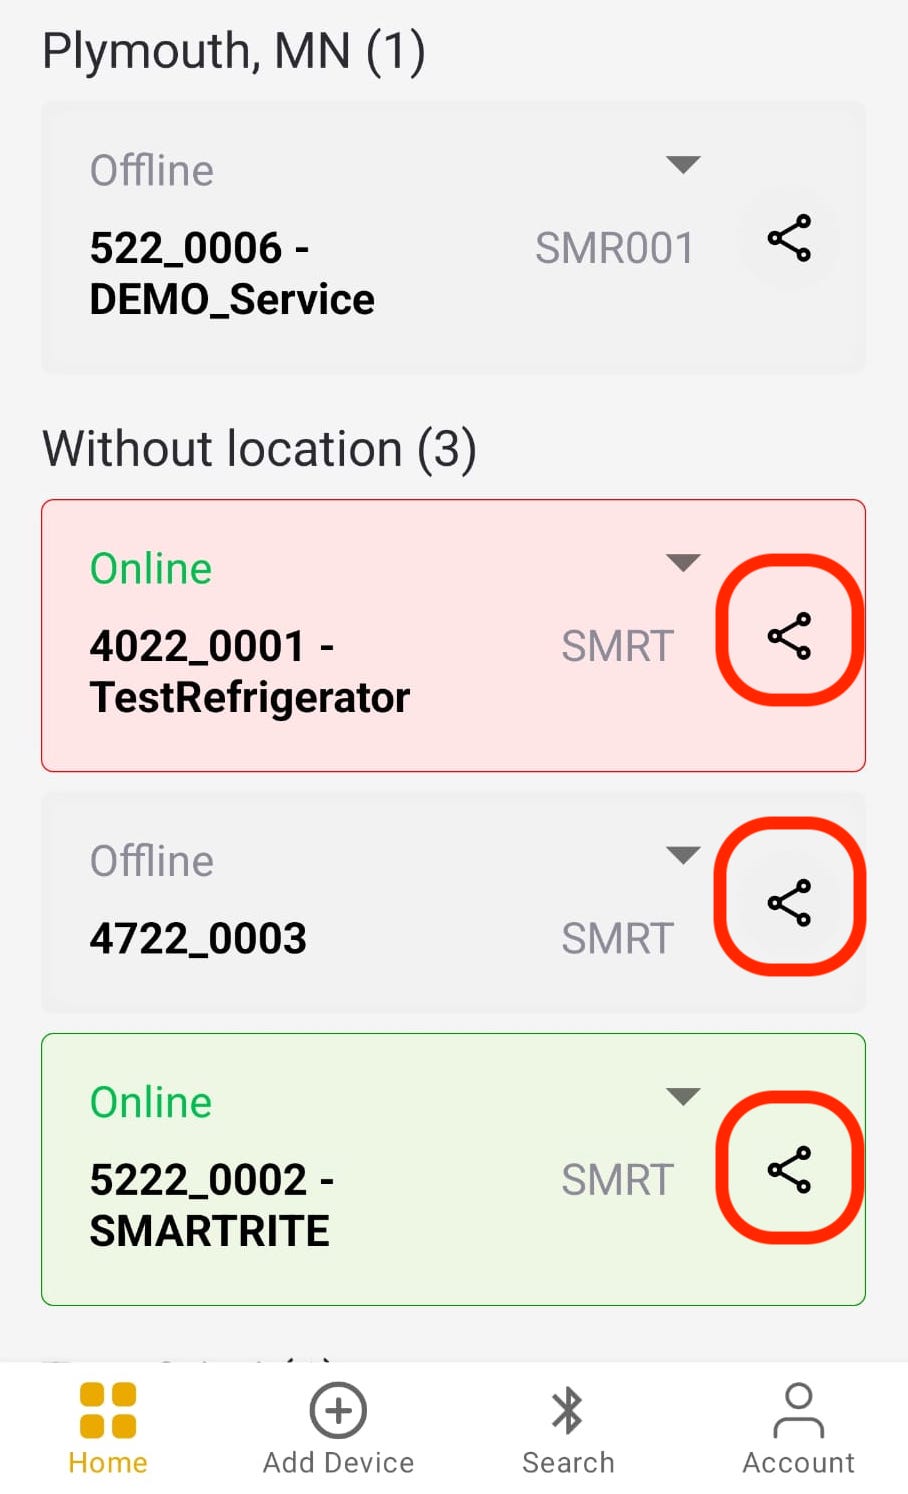
Devices List - Device
Device List is the main screen of the mobile application where all the devices assigned to a user are available in the form of extendable cards.
Disconnect
Press this button to disconnect the BT connection to the device
If the card color is green, it means that the device is online (is transmitting live events to

If the color of the card is gray, this means that the device is not online and does not transmit
If the color of the card is red, this means that the device is online and one or more alarms are active for the device.
Note
Every time an alarm occurs for an online device, a push notification is sent to the mobile phone for the users who have that device assigned and, of course, have the Smartrite app installed on their mobile phone.
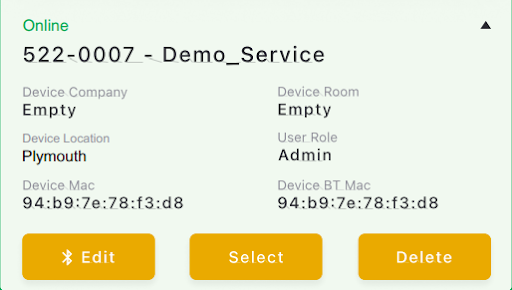
Devices List - Buttons
Edit
The edit button is responsible for connecting the Smartrite app via Bluetooth to the device and configuring the Wi-Fi network. See instructions for configuring the device's Wi-Fi. In this case, instead of searching again for all nearby devices, it connects directly to the device you want to configure.
Select the desired Wi-Fi network from the list. A pop-up will appear on the phone screen where you can enter the Wi-Fi network password.
Note
It is necessary to be within 5 m of the device to use the Bluetooth functionality
Select
The select button is responsible for displaying the Device monitoring screen
Delete
Use theDelete buttonto unallocate the device from the list of the devices your user is monitoring.
Note
If you delete the device from the list of monitoring devices, the effect will also propagate on the cloud web platform.
Warning
Unallocating the device is not equivalent to deleting the data or the device from the platform.
Share Device
From the device monitoring screen, for each device, the Share button is available in the upper right corner of each device (card).
This function allows a device to be shared by a device administrator to power users and users.
When the device is shared with another user, an e-mail is sent to that user with all the required information to access the device in the cloud.
The admin will establish the user access level for the shared device by selecting it from the dropdown field: Admin, Power User or User.
Note
To be able to share a device with a user, the user must have an account on the Smartrite platform smartrite.everidge.com.
To see which devices are already shared, tap the three dots icon at the top right corner of the screen and navigate to the Shared Devices section where all the information will be displayed.
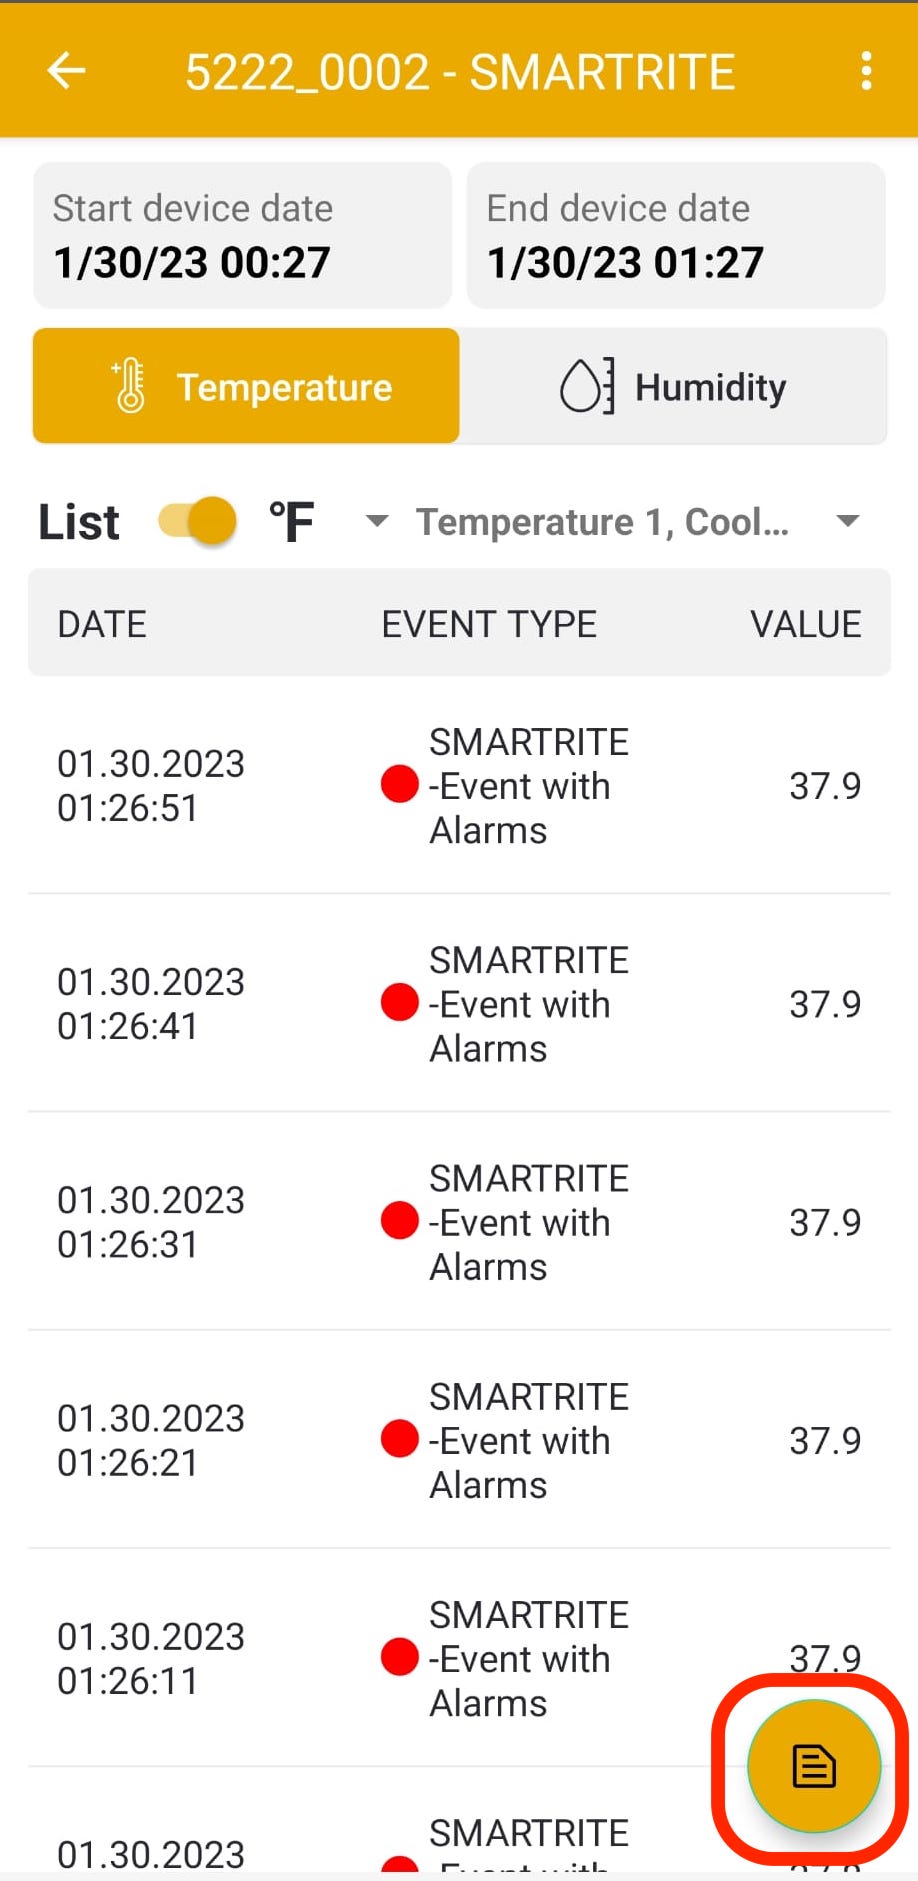
Device Monitoring Screen
The device monitoring screen can be accessed by pressing the Select button on each card (device) from the Devices List screen.
This screen contains:
Grouped in temperature and humidity tabs. Switch between logger (list) and charts using the corresponding switch on the screen.
Temperatures can be displayed in °F or °C, by selecting the corresponding unit from the drop-down list.
The monitoring time interval can be selected for the start date and time and end date and time, both for the chart and the list view. The list can be exported in CSV format and externally shared.
Note
The maximum period for accessing and displaying the history from the mobile app cannot exceed the interval of 14 calendar days. For an extended view, please use Smartrite Cloud Web App smartrite.everidge.com.
By default, the monitoring period in the logger is set for the last hour.

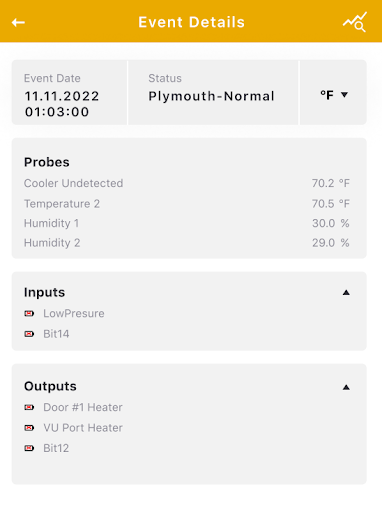
Event Details
By clicking on an event from the monitoring list in the device monitoring screen, the event detail screen will be displayed. The screen contains:
- The ID of the device
- The location
- The date and time of the event
- Event Type
- The active alarms that were triggered
- Information about the active probes,
- The device inputs and outputs state.
Event export to csv
Press the Paper button to download the temperature or humidity list. The .csv file is saved in the Downloads folder on your mobile. The app automaticaly propose you to share the file using an appropriate app installed on the mobile (email, WhatsApp etc.)